Peach season is a glorious time—those juicy, fragrant fruits just beg to be preserved so you can enjoy their sweetness long after summer fades. If you don’t own a fancy canning setup, don’t worry! It might surprise you, but you absolutely can can peaches without using a canner. Whether you’re a seasoned homesteader or a curious home cook, this guide will walk you through preserving peaches with tools you already have in your kitchen.
Get ready to fill your pantry with jars of golden summer goodness!
Why You Should Preserve Peaches Without a Canner
Canning is a practical, economical, and rewarding way to reduce food waste while savouring the peak flavours of seasonal produce. But what if you don’t have specialised canning equipment? Many people assume that it’s impossible to can without a water bath canner or pressure canner, but that’s not the case.
Here’s why you might want to explore canning without a canner:
- Accessibility: Not everyone owns a canner, and investing in one can sometimes feel unnecessary if you only can occasionally.
- Simplicity: Canning without a canner allows you to get started immediately, without running to the store to buy new equipment.
- Ingenuity: It promotes creativity in the kitchen, allowing you to work with tools you already have.
Now that you’re on board, let’s jump into the how-to!
Tools You’ll Need for Canning Without a Canner
No canner? No problem. You can recreate the effect of a canner using basic kitchen tools. Here’s what you’ll need:
- Jars with Lids: Mason jars are the gold standard. Make sure they’re sterilised and free of cracks.
- Large Pot: Any deep, wide pot will do as long as it fits your jars with a little space for water to circulate around them.
- Lid for the Pot: A snug-fitting lid will keep steam in and maintain the necessary heat.
- Tongs or Jar Lifter: You’ll need these to safely remove jars from hot water.
- Cooling Rack or Towel: For placing your jars after they’re processed.
- Clean Kitchen Towel: For drying jars and handling hot equipment.
Pro tip: To prevent your jars from bumping or cracking during the process, line the bottom of your pot with a tea towel or place an improvised rack (like a silicone trivet or spare metal rack) in it.
With your tools ready, it’s time to start preparing those peaches!
Step-by-Step Guide to Canning Peaches Without a Canner
Step 1: Prepare Your Jars
Sterilising your jars is crucial to ensuring your final product is safe to eat. Wash them thoroughly with hot, soapy water, then submerge them in boiling water for 10 minutes. Lay them on a clean kitchen towel to air dry.
Meanwhile, place your lids in a small saucepan of simmering water to soften the rubber seal.
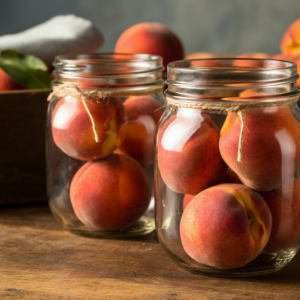
Step 2: Peel and Slice Your Peaches
Start by blanching your peaches to make peeling easier. Place them in boiling water for about 30 seconds, then transfer them to an ice bath. The skins should slip off effortlessly.
Slice the peaches into halves, quarters, or wedges—whichever you prefer—and remove the pits.
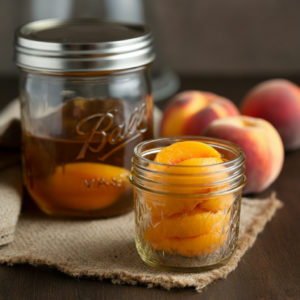
Step 3: Prepare Your Syrup
For canning peaches, you’ll need syrup to preserve their colour, texture, and flavor. You can make:
- Light Syrup: Mix 1 cup of sugar with 4 cups of water.
- Medium Syrup: Mix 1¾ cups of sugar with 4 cups of water.
- Heavy Syrup: Mix 2¾ cups of sugar with 4 cups of water.
Bring your chosen syrup to a boil, stirring until the sugar dissolves.
Want to experiment? Swap half the water for fruit juice (like apple or white grape) for a natural twist.
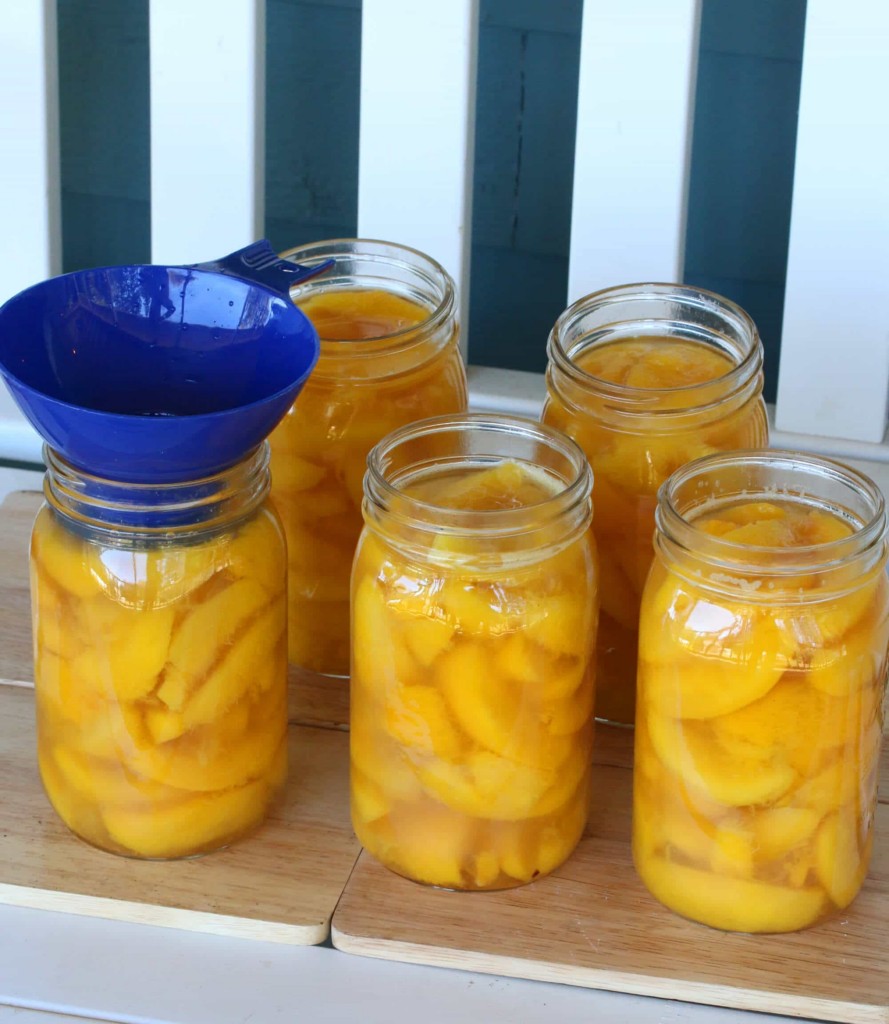
Step 4: Pack Your Jars
Fill your sterilised jars with the peach slices, arranging them snugly without squishing them. Pour hot syrup over the peaches, leaving about 1 cm of headspace. Use a clean butter knife or skewer to gently release any trapped air bubbles.
Wipe the rims with a damp towel, then place the lids on top. Screw the bands onto the jars until finger-tight (not overly tight).
Step 5: Process Your Jars
Here’s where the magic happens—without a canner!
- Place your lined pot (with its towel/trivet base) on the stovetop and arrange your jars inside, ensuring they aren’t touching.
- Fill the pot with enough water to cover the jars by at least 2-3 cm. Use hot water for this step to avoid shocking the glass.
- Bring the water to a boil, then reduce the heat slightly. Maintain a gentle boil for about 20–25 minutes if using pint jars, or 30 minutes for quart jars.
Remember to keep the lid on to trap the heat and steam.
Step 6: Cool and Check the Seals
Carefully remove the jars from the pot using tongs or a jar lifter and place them on a cooling rack or towel, leaving space between each jar. Allow them to cool undisturbed for 12–24 hours.
Once cooled, check the lids. A properly sealed lid will not pop when pressed. If a jar hasn’t sealed, store it in the fridge and use it within a week.
That’s it—you’ve canned peaches without a canner!
Tips for Success
Even without a canner, you can achieve great results by keeping some key tips in mind:
- Work Clean: Sterilisation is critical to prevent bacterial growth during long-term storage.
- Mind the Headspace: Leaving enough headspace ensures a proper vacuum seal and prevents spillage.
- Batch Processing: If you’re preserving a lot of peaches, work in small batches to maintain quality.
- Label Your Jars: Note the canning date so you can enjoy them before they expire (typically within a year).
By following these tips, you’ll maximise both the flavor and safety of your canned peaches.
Make This the Year of Home-Preserved Goodness
Canning peaches without a canner might sound like a challenge, but it’s an incredibly approachable way to preserve the best of summer, even if you’re new to preserving.
Once you’ve mastered peaches, why not try your hand at other fruits or vegetables? Apples, tomatoes, and even pickles can easily make their way to your pantry shelf without special canning equipment.
With just a pot, some jars, and a bit of enthusiasm, you’ll not only save money and reduce waste but also create delicious, homemade goods that will fill your home with sunshine—even in the middle of winter.