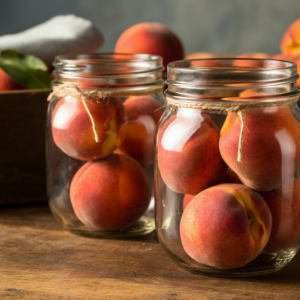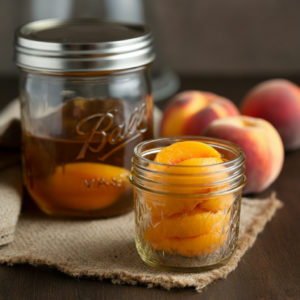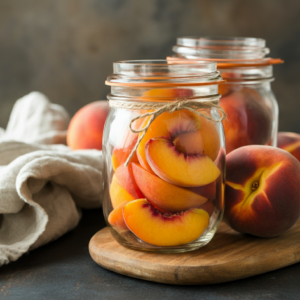
There’s something magical about preserving peaches at the peak of their sweetness, knowing you’ll enjoy a taste of summer even in the chilliest months. But when it comes to canning peaches at home, many home cooks and homesteaders face a common question—what’s the best method? Should you go with pressure canning peaches or rely on the trusted water bath method?
This guide will walk you through everything you need to know to confidently can peaches using either method. Whether you’re new to preserving or a seasoned expert, we’ll explore the pros and cons while equipping you with step-by-step instructions to get it just right.
Why Preserve Peaches?
Peaches are a delectable, versatile fruit that can be used in everything from cobblers to smoothies. But fresh peaches have a relatively short shelf life. That’s why canning is such a wonderful way to lock in their rich flavor and extend their usability. When done right, home-canned peaches retain their fresh taste, vibrant color, and nutritional value for up to a year or more.
Canning also allows you to enjoy peaches without any unnecessary additives or preservatives—perfect if you’re focused on feeding your family wholesome, quality food.
Now, let’s look at the two canning methods in detail and discover which one suits you better!
Method 1: Water Bath Canning (A Beginner-Friendly Classic)
What Is Water Bath Canning?
Water bath canning is a popular method that involves submerging jars of peaches in a large pot of boiling water until they’re properly sealed. This technique is suited for high-acid foods, like peaches, which naturally maintain safe pH levels during the preservation process.
Why Choose Water Bath Canning?
Water bath canning is perfect for beginners because it’s straightforward and requires minimal equipment. Most kitchens already have the essentials to get started, like a large stock pot, canning jars, and a rack to hold jars in place.
It’s also a method steeped in tradition—many veteran canners swear by this classic approach for its simplicity and reliability.
Step-by-Step Guide to Water Bath Canning Peaches
- Prepare the Peaches
- Wash the peaches thoroughly.
- Blanch them in boiling water for about 30 seconds, then transfer them to ice water. This makes peeling easy.
- Remove the skins, slice the peaches, and remove the pits.
- Make a Syrup (Optional)
- You can preserve peaches in a light or medium syrup, plain water, or even fruit juice. Simmer your liquid of choice while you prepare the peaches.
- Pack the Jars
- Fill sterilized jars with peach slices, leaving about 1/2 inch of headspace at the top. Pour the warm syrup over the peaches until they are fully covered.
- Seal the Jars
- Wipe the rims of the jars clean, apply the lids, and screw the bands tightly but not overly so.
- Process in the Water Bath
- Place the jars into a pot of boiling water, ensuring the water covers them by at least 2 inches.
- Process for 20–30 minutes, depending on your altitude.
- Cool and Store
- Remove jars carefully and set them on a towel to cool. Ensure the lids are sealed properly by pressing the center—it shouldn’t pop!
Water bath canning is a delightful, easy method that many find highly rewarding. However, it may not be suitable for everyone. This brings us to our next technique.
Method 2: Pressure Canning (For the Adventurous Canner)
What Is Pressure Canning?
Pressure canning involves sealing your jars inside a specialized pressure canner, which uses high heat and pressure to preserve foods. It’s often the go-to method for low-acid foods, but can also be used for peaches—especially if you add minimal sugar or stretch preservation timelines.
Benefits of Pressure Canning Peaches
Pressure canning takes food safety to the next level. Its higher temperatures better destroy bacteria or spores lingering in your food, ensuring a longer shelf life and greater peace of mind. If you’re someone who likes to experiment with infusions or less-sweet preserves, pressure canning could be your best bet.
Step-by-Step Guide to Pressure Canning Peaches
- Prepare the Peaches
- Follow the same peeling, slicing, and prepping process described for water bath canning.
- Pack the Jars
- Load your jars with peach slices, syrup (if desired), and leave the same 1/2 inch headspace at the top.
- Seal the Jars
- Wipe the rims, apply sterilized lids, and fasten bands until snug.
- Load the Pressure Canner
- Place jars inside your pressure canner. Add the recommended amount of water (per your model’s instructions), then seal the lid.
- Build Up & Maintain Pressure
- Heat the pressure canner until the desired pressure level (usually 6 or 11 pounds) is reached. Process the jars for about 10–15 minutes from this point.
- Cool Down Safely
- Allow the canner to cool down and decompress to ensure jars seal without cracking.
- Store Your Peaches
- Confirm all seals—no popping lids!—before labeling and storing your jars in a cool, dark place.
While pressure canning may sound intimidating at first, modern pressure canners come with built-in safety features, making them much easier to use than you might imagine!
Which Method Should You Choose?
Choosing between water bath canning and pressure canning depends on your priorities and circumstances. Here’s a quick comparison to help you decide:
| Feature | Water Bath Canning | Pressure Canning |
|---|---|---|
| Ease of Use | Beginner-Friendly | Requires More Practice |
| Equipment Needed | Stock Pot & Rack | Pressure Canner |
| Processing Time | ~20–30 Minutes | Shorter (~10–15 Minutes) |
| Shelf Life | Up to 1 Year | Can Exceed 1 Year |
| Food Safety | Ideal for High-Acid Recipes | Superior Safety for All Foods |
While water bath canning is a fantastic starting point, pressure canning appeals to those seeking versatility and maximum shelf life.
Make The Most of Your Home-Canned Peaches
Canned peaches are a joy to have on hand. Here are some creative ways to use them in everyday cooking:
- Top your morning oatmeal or yogurt with sliced canned peaches for a fruit-filled breakfast.
- Bake a quick peach cobbler or pie—your guests will be begging for the recipe!
- Add canned peaches to smoothies for natural sweetness.
- Serve them as a dessert on their own with whipped cream or ice cream.
Your Peach-Preserving Journey Begins Here
Whether you go with water bath canning or pressure canning peaches, both methods allow you to preserve vibrant, juicy flavors year-round. Try one (or both) techniques, and enjoy the satisfaction of canning your own fresh produce.


